If you are new to Facebook, this how to use Facebook guide is for you. Facebook is usually regarded as the most popular social media platform, and its popularity is unlikely to fade anytime soon. Even data breaches won’t be enough to bring this behemoth down.
So, if you want to get started on Facebook and take advantage of its social features, we’ve got you covered. We’ll show you how to get started and make the most of Facebook in our in-depth Facebook guide, which includes easy-to-follow step-by-step instructions.
How to use Facebook
Here are the Facebook fundamentals that every marketer should be aware of. When you’re finished here, you’ll have a better understanding of status updates, Facebook friends, images and videos, and more.
How to Sign up Facebook
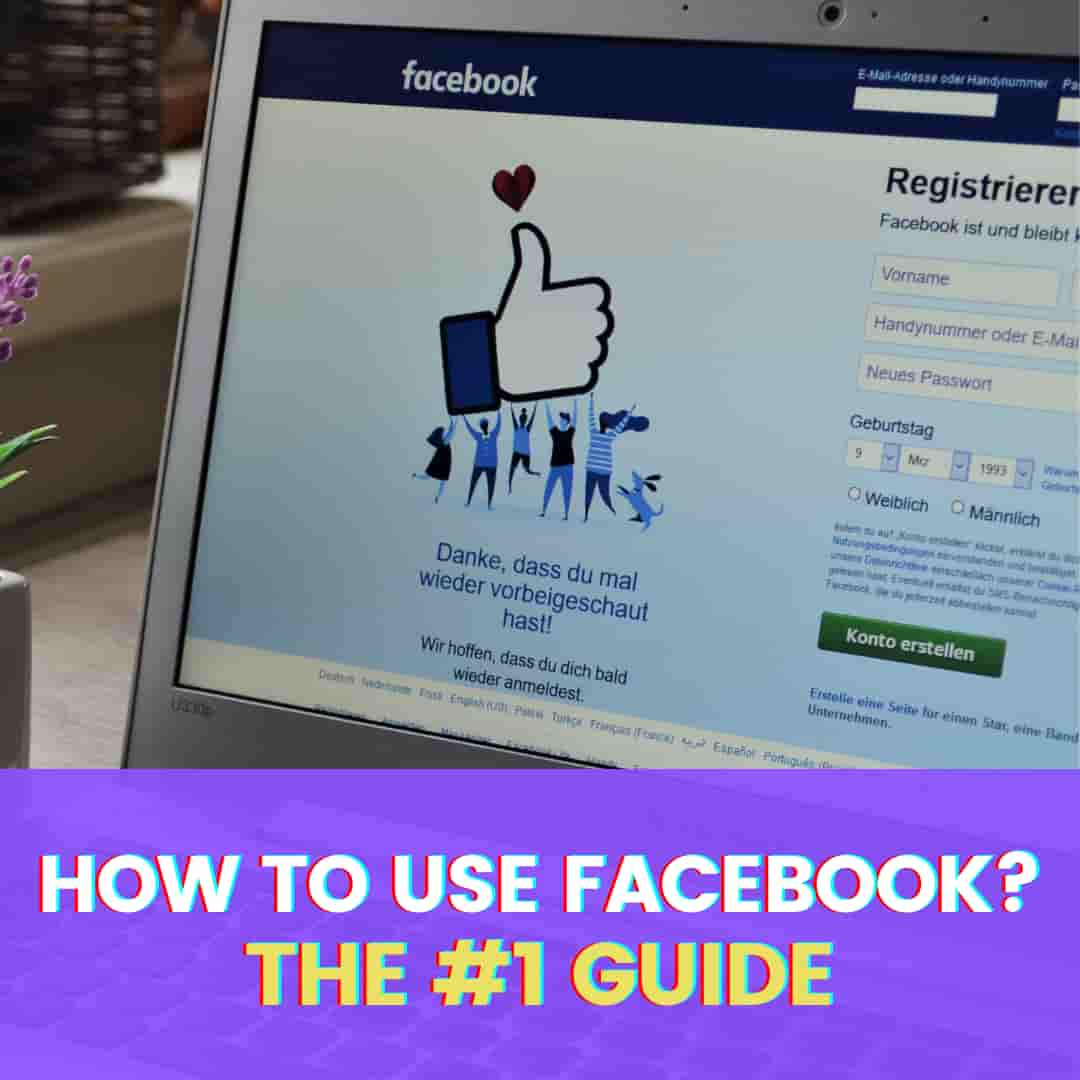
The very first step is to sign up for a Facebook account and it’s quite simple. It’s simple to get started with the platform.
Go to Facebook’s home page and fill out the necessary details. You’ll be asked for your first and last names, email addresses or phone numbers, gender, and date of birth.
You’ll be asked to create a password for your account as well.
Configure Your Facebook Privacy
Staying secure on Facebook is one of the most crucial fundamentals. You can alter your privacy settings after you’ve created your new profile. This determines who has access to your profile and the information you share.
To change these settings, go to the ‘Settings menu.
Then select the ‘Privacy’ option and make the necessary changes. On Facebook, you may also regulate how other people find you and contact you.
Customize Your Facebook Profile
This is one of the most entertaining Facebook fundamentals to be aware of. It allows you to express yourself creatively.
On Facebook, there’s a good possibility you’ll have a name in common with someone else. That is why you should make your profile unique.
Your friends and family will be able to find you easily if you have a personalized profile.
You can include a profile image, a cover photo, and personal information such as your current location and hobbies.
Make changes to your Facebook profile
If you need to edit your profile later for any reason. Simply navigate to your profile’s ‘About’ section. You can then fill in more information about yourself. You can provide information such as your degree, job title, and other details.
It would be easier for your Facebook friends and audience to find you if you have a well-detailed profile.
Select a Facebook profile photo
You can choose a profile picture from a photo you’ve been tagged in on Facebook or one you’ve previously posted.
You can also choose a recent photo that you took on your phone and add a frame to it.
When it comes to Facebook fundamentals, this one should not be overlooked. Make sure the image you choose will be linked with your brand.
Select a Facebook Cover Image
You can choose your cover photo the same way you did your profile photo. It may take some trial and error to get your photos to look just right. For a more in-depth look at how to get image sizes right on social media, see our social media image size guide.
Timeline on Facebook
Your Facebook timeline is a backward-chronological log of your activities. On your timeline, you’ll be able to see your uploaded images and status updates.
In addition, any images that your friends have tagged you in will appear here.
Facebook Public pages
Facebook users can follow public pages and receive notifications about their activities. Celebrities, bands, sports teams, and other public people are examples of these pages.
You may look up and follow your favorite musicians, shows, and movies. Just a word of caution: double-check the page’s authenticity. Many admirers create phony profiles for celebrities, and if you don’t check, you can be following the wrong page.
You’ll see a page’s updates in your Facebook newsfeed once you follow it.
Facebook Posting
Posting stuff you wish to share with your friends and family is one of the many exciting elements of Facebook.
You can keep everyone up to date on your life’s events.
Use the text box at the top of your feed or profile page to share a Facebook status update.
Text with various colored backgrounds, stickers, movies, images, and even URLs can be shared here.
It is also possible to discuss feelings and actions. You can also ‘Check In’ to let everyone know where you’re eating or spending your vacation.
If you’ve spent time with your pals on Facebook, you can tag them. If you’re having a good time at a huge event, you can also tag it.
Basics of Facebook – Friends
The purpose of Facebook is to keep in touch with your pals no matter where they are. You can add your friends in a few different ways. You can utilize the ‘Find Friends’ tab to search for them, or import your email (or phone and iCloud) contact list.
Select the ‘Find Friends’ option to use the latter option. You’ll see a list of people who might become friends with you. This is determined by factors such as your current location and the friends you’ve already added.
Additional Facebook Features
Recommendations – You can get advice on almost everything from people on Facebook.
Support for non-profit organizations – Choose an organization to support and post about it on your status. Your Facebook pals can contribute to the cause.
Questions – Facebook allows you to ask questions and respond to those asked by other users.
Facebook Stories – You may use a Facebook story to share all of your material. You can also view shows that your friends have shared. For more information on Facebook Stories, see this article.
Lists – To share with your friends, you can make your themed lists.
Photos And Videos on Facebook
Facebook allows users to post a variety of media, including images and videos. You may also share albums and live broadcasts.
To upload, go to your profile, click the ‘Photos’ tab, and then click ‘Add Photo/Video.’ You can use this to upload files from your computer.
By selecting the ‘Create Album’ option, you may also create albums containing photos and videos. After that, choose the media you wish to include in your albums.
Although this is one of several Facebook fundamentals you can experiment with, keep quality in mind.
You should never share media that isn’t of the highest quality possible.
Facebook Newsfeed
Your individual page’s newsfeed is unique. You’ll see postings from your friends as well as pages you’ve liked that Facebook believes you’ll enjoy. You will also see advertisements for brands that you may support or use.
Manage your options to modify the appearance of your feed. Go to the ‘Settings’ menu and click on the ‘News Feed Preference’ option. You have the option of selecting the content you want to see first, as well as other options.
Going Live on Facebook – The Basics
This is a cool tool that allows users to broadcast live to their peers. Simply click the ‘What’s on your mind?’ button and select the ‘Live Video’ option.
Once you’ve chosen this option, you may write your broadcast’s description, add a feeling or activity, and tag individuals. You can also include a poll and donate to a non-profit.
Simply press “Go Live” after you’ve done explaining your program to begin recording.
Some Facebook users like live-streaming their games or musical activities.
Connecting on Facebook Now we’ll delve into the more technical aspects of Facebook…
Connect
There are numerous ways to connect with other individuals on this site, which is one of its main features.
On your timeline, you may see and engage with updates from Facebook friends.
Facebook allows you to respond to and comment on posts.
You can also share your favorite articles. You can also share posts and other stuff on your friends’ timelines if you want to.
One method to signal that you enjoy a post is to use Facebook’s iconic “like” thumbs-up. You can also show affection for a post by ‘loving’ it, laughing at it, expressing indignation, wonder, or grief, and caring about it.
Facebook Status
Without mentioning status updates, no Facebook lesson or guide would be complete. On the platform, these are the most prevalent types of posts.
You can change your status by typing in the “What’s on your mind?” box. Many Facebook users see it as a quick method to update their friends and family on what’s going on in their life.
Status updates are short and to-the-point, and they can even be ambiguous at times.
Many Facebook users enjoy sharing motivational quotes in this manner.
Although you may believe that status updates are trivial, they reveal a great deal about a person. You can use them to show off your creativity to your Facebook friends or to start conversations with them.
Messenger
This is Facebook’s chat feature, which allows users to send messages to one another.
If you need to stay in touch with your pals while not using Facebook, you can also download the app.
To send a message using Messenger, go to ‘Home’ and click on the Messenger icon, or click on the ‘Messages’ button on any page.
By selecting the ‘New Group’ option, you can create group chats for a small group of people. The name of the group, as well as the members who will be a part of it, are entirely up to you.
When sending messages on Facebook, you can include pictures, stickers, emoticons, GIFs, and movies.
READ: How to report problems with Facebook Messenger
Messenger Calls on Facebook
Messenger on Facebook also allows you to make voice and video calls. This is a wonderful place to meet with coworkers, potential clients, and partners. Keep in mind that you must maintain a professional demeanor at all times, even on a more informal social networking platform. That’s it for Facebook 101!
Facebook’s Other Features
On the popular platform, there are additional elements that will engage users. Keep an eye on the ‘Events’ page, which lists events that your friends are interested in. It also displays events organized by groups to which you belong.
You’ll also have quick access to the Groups you manage and belong to. There, you’ll find Facebook’s recommendations for groups that it believes you’ll appreciate.
Games on Facebook
Facebook games has a large number of popular games to choose from. Some are designed for single play, but many may also be enjoyed with companions. We don’t advise you to devote too much time to this function.
Facebook Marketplace
If you’re wanting to purchase and sell products in your local area, you might want to check out Facebook’s Marketplace
You can find just about anything here, from pet food to lodging and for-sale autos.
Let’s delve into more detail now that you’ve learned the fundamentals of Facebook.
We’ll go over how to ban people, deactivate groups, and even erase your Facebook account if you ever want to.
The marketplace is also a terrific opportunity to show your support for Facebook friends who are selling goods.
Change Your Name on Facebook
Here’s How to Change name on Facebook
Users on Facebook may desire to change their names for a variety of reasons.
Perhaps you don’t like the name you chose when you were a teenager, or you married. Perhaps the name no longer fits your Facebook profile and presence.
Whatever the case may be, Facebook lets you make the appropriate adjustments.
Remember that you can only alter your name a few times, so make the most of your opportunities. It’s unclear how many times ‘a few times’ means.
Keep in mind that you are not permitted to use pseudonyms or fictitious names on Facebook.
Symbols and digits, as well as improper terms, titles, and inappropriate language, are not accepted as names on the site. Keep in mind that your new name will be visible to your Facebook friends.
Furthermore, certain characters and punctuation marks are not recognized by Facebook.
Let’s dive into how to alter your Facebook name now that you know what to avoid when changing your name.
The First Step
Make sure you’re logged in to your account first. Then, at the top right of the page, click the small down arrow button.
Then go to ‘General Account Settings’ by clicking on “Settings.”
Step Two
Now, next to your name, select the ‘Edit’ option. Then you can type in the names you like. Facebook will remind you that you can only choose a new name once every 60 days, so double-check your spelling.
You can also use a different name.
the third step
Click ‘Review Change’ and enter your password once you’re happy with the new name you’ve chosen.
If you forget your Facebook page is open while they’re present, this stops devious friends from altering your name to something stupid.
Fourth step
Select ‘Save Changes’ now. You’ll need to wait a day for the modification to take effect.
That concludes our discussion.
How to change name on the Facebook app?
If you don’t have access to a computer, you can change your name using the Facebook app on your iPad, smartphone, or tablet.
The procedure is straightforward.
The First Step
Log in to your Facebook account using the Facebook app.
Step two
The menu option, which looks like three bars, should be at the top-right area of your screen.
the third step
Select the ‘Settings and Privacy’ menu option from the drop-down menu. Go to ‘Account Settings’ and select the ‘General’ option once you’re in the menu.
Fourth step
Your personal information will now be shown, and you may manage everything from here. You’ll notice a ‘Change Name’ option if you tap on your name.
Step five
Make any necessary modifications to your names. Always remember to follow the rules. In this section, you can also update your language-specific name. Your Facebook name, translated into another language, is known as a language-specific name.
Step six
After you’ve made all of the changes you desire, go to ‘Review Change’ and choose the display option that best suits your needs. To continue, type your Facebook password.
Step seven
You can now select the option to “Save Changes” and you’re done. However, it could take up to 24 hours for your name to be changed.
How to change name on Facebook using an iPhone?
If you don’t have access to a computer, you can change your name using the Facebook app on your iPad, smartphone, or tablet.
When you’re on your phone, changing your name on Facebook is relatively simple.
The steps are as follows.
The First Step
After logging in to your account, open the app and tap the bottom right hamburger symbol, which should appear like three horizontal lines.
Step Two
Next, go to ‘Settings and Privacy,’ tap ‘Settings,’ then tap ‘Personal information.’
the third step
You’ll now see your account information, then tap on your name to access the ‘Change Name’ option.
Fourth step
Choose the new name you want to appear on your Facebook page. When you click ‘Save,’ your changes will be permanent. Keep in mind that you may not see your new name for a day or two.
Why can’t I change my Facebook name?
There could be a few reasons why you’re having trouble updating your name or the name of your profile page.
It’s possible you’re not adhering to Facebook’s name policy, or you’ve changed your name within the last 60 days. Make sure your name follows all of the regulations and does not contain any symbols or letters.
Additionally, if you change your name too frequently, Facebook will notice and take action. It’s also possible that the name on an item from Facebook’s ID list does not match your name.
Your Used ID is nothing more than a series of numbers associated with your account.
Every time a new account is established, it is given a unique ID.
You can learn more about your user ID if you want to.
If the platform detects that you have changed your name too frequently, you may be required to wait 120 days before attempting to use it again.
Additionally, if you change your name too frequently, Facebook will notice and take action. It’s also possible that the name on an item from Facebook’s ID list does not match your name. You can always contact Facebook if none of the above addresses your question.
You can request a name change by filling out a form.
How to Block or Unblock on Facebook
How To Block Someone On Facebook It is critical to understand how to block individuals because it is very feasible for someone to become a nuisance.
It’s not difficult to block someone on Facebook.
The First Step
Go to the person’s profile you want to block.
Step two
Select the ‘Block’ option from the three dots available below their cover image. You must confirm your desire to block the user. After you’ve done this, the person won’t be able to see you or contact you.
Unblock someone on Facebook
Next to the name of the person you wish to unblock, select the ‘Unblock’ option. Select ‘Confirm’ from the drop-down menu.
The person will now be able to contact you again, and you will have to wait 48 hours before you may block them.
What Is The Best Way To Block Someone On Messenger?
While blocking a user on Messenger is simple, you should be aware that doing so will not also block them on Facebook.
When you block someone on Facebook, they are also blocked on Messenger, however, barring someone on Messenger simply stops their messages and calls.
The First Step
On your phone or tablet, open the Messenger app.
Step two
Now, tap on your profile image to access your profile information.
the third step
Scroll down to the ‘Preferences’ section and select ‘People.’
Fourth step
After that, pick ‘Add Someone’ from the ‘Blocked’ menu.
Step five
Scroll through your Friend list and select the contact you wish to block by clicking on their name. You’ll be redirected to a new page where you may select “Block on
Messenger.” You’re done once you’ve confirmed that you want to block the person.
How to Unblock Someone On Messenger?
If you change your mind about blocking someone on Messenger, reversing the block is simple.
Follow the same procedures you did to block a person until you get to the ‘Blocked’ option on the ‘People’ page.
A list of all the persons you’ve blocked on Messenger will now appear. Select the contact from the ‘Unblock on Messenger’ menu. You’ll get a pop-up asking you to confirm, and then you’re done!
Here’s how to unblock someone on Facebook using phone?
If you’re on your phone, you can easily block a Facebook member.
The First Step
Go to your Facebook account and log in.
Step two
Select the ‘More’ button in the top-right corner of your News Feed. Then go to the ‘Help and Settings section of the menu.
the third step
Go to your ‘Account Settings’ and select the ‘Block’ option.
Fourth step
Select the person you want to unblock from the list that appears.
That’s how you go about blocking and unblocking someone on Facebook. They will no longer be able to see your status updates, profile page, or personal information once you have done so.
Delete or Deactivate Your Facebook Account?
How to Deactivate or Deactivate a Facebook Account
You can delete your Facebook account if you’ve had enough of it for any reason. If you’re not sure you want to go that far, we’ll go through how to delete Facebook as well as how to deactivate Facebook.
Consider your options before deactivating your Facebook account. Make sure it’s exactly what you’re looking for.
A few days after the initial request, Facebook deletes the account. Your account will not be destroyed if you chose to log in within that period.
You will not be able to recover your account after it has been deleted. It could take up to 90 days for all of your data to be erased from backup systems.
If you’re not sure if you want to delete your Facebook account, deactivate it instead.
Other users won’t be able to find you or see your profile if you deactivate your Facebook account.
Keep in mind that some information, such as messages you’ve sent, will remain. Facebook keeps track of your account information in case you decide to delete it.
But, if you’re certain you want to erase your Facebook account permanently, here’s how.
Note: Facebook has a tool that downloads data into a ZIP file that you may use to backup your information. You can do so by going to the ‘Your Facebook Information’ page in the settings menu.
The First Step
Go to your Facebook Settings page and select ‘Your Facebook Information.’
Step two
Choose the ‘Deactivation and Deletion’ option from the drop-down menu.
the third step
Then, check the box labeled “Permanently Delete Account” and click “Continue.” Before you can continue to remove your account, you must first key in your password.
You will receive the last message from Facebook informing you that you have 30 days before your account is permanently deleted.
That’s all there is to it — that’s how you can get rid of Facebook from your life.
How to deactivate Facebook Account
If you prefer to deactivate your Facebook account, follow these steps:
The first two steps are the same as when you delete your Facebook account. To deactivate, however, simply select the ‘deactivate’ option.
After you’ve made your choice, click ‘Continue,’ input your password, and proceed.
That’s all there is to it; you now know how to deactivate your account.
On a phone, how do you delete Facebook?
It’s quite simple to delete your Facebook account from your phone. Facebook, in reality, makes it quite simple. Simply click on this link to be transported to a page on your mobile web browser where you can delete your account.
You’ll only need to confirm that you wish to delete your account and enter your password after that. Then you’re done, and Facebook is no longer available.
Without an email address or a password, how can I delete my old Facebook account?
You want to remove your old Facebook account, but you don’t remember the old email address that was associated with it. You’ve also forgotten your password.
There are a few options, and we hope this guide is useful. Remember, only do this if you’re certain you want to remove your account permanently, not just deactivate it.
The first thing you should do is try to recover your previous Facebook password. Go to this Facebook page and look for the previous account there.
To set it up to search, enter the phone number or email address that was used.
Although the search screen does not specifically state that you can use your name, you can.
Your account should appear, depending on your security options. You can choose ‘I’m not on this list if you don’t see it. After that, Facebook will prompt you to enter the name of a friend and begin searching again.
You can send a reset code to any of the phone numbers or email addresses linked with your former account after you’ve located it. You’ll see a redacted version of the email address you used on Facebook.
Things will be much more difficult if you don’t have access to the phone number or email address.
Another method exists, but it is not as straightforward.
Try to contact Trusted Friends
You can choose a few Trusted Friends on Facebook who can assist you in regaining access to your account if you forget your password.
However, if you haven’t set up this functionality, it will be useless. Only a few people went to the work of putting it together.
You can tell Facebook that you don’t have access to your email or phone number if you did set up this option. Select ‘No longer have access to these?’ from the drop-down menu.
Then, under ‘Reveal my trusted contacts,’ type the entire name of any of your Trusted Friends.
Facebook will provide you with a unique URL that must be shared with all of your Trusted Friends. It includes a recovery code that will allow you to reactivate your account. Each of your buddies will have to assist you in obtaining it.
Facebook will not contact your pals on your behalf; you must do so yourself. It isn’t much you can do to retrieve the account if you can’t contact these buddies for some reason.
Go to your Account Settings and access your Security and Login Settings if you’re following this article and want to be prepared. If you can’t get into your account, choose between three and five people to call.
Delete Your Old Account
You might take a different route and report the old account as fictitious. If Facebook believes your account is a phony, they will erase it for you.
To report a fraudulent account, go to the ‘Give feedback or report this profile’ option after clicking the three dots on the bottom right of the cover photo.
Select the ‘Pretending to be someone else’ option and choose ‘Me’ as the impersonator.
That should be sufficient for Facebook to permanently cancel the account.
Last option
If you’ve tried everything else and still haven’t had any luck, there’s one last, time-consuming alternative.
If you live in the European Union, the GDPR offers you the right to request that corporations like Facebook remove your personal information if you want them to.
This is an option if Facebook does not react to your request to remove your account.
The site also uses TrustArc, a third-party company, to arbitrate disputes. However, it is unknown how successful this attempt will be. You can also use the Data Policy Help Center Contact form on Facebook.
We hope that one or more of these suggestions may assist you in your Facebook removal goal. When you don’t have your previous information, deleting your account can be difficult, but it’s not impossible.
Remember that once you’ve deleted your account, there’s no going back. You must be certain that this is what you want. When it comes to account termination, there is no ‘backsides.’
There is no method to retrieve a Facebook account that has been deactivated. Your data is held for 90 days, after which it is deleted permanently by Facebook.
You will also lose access to any apps that you have signed into with your Facebook account. It’s possible that you won’t be able to use them and will have to register new accounts or log in with new credentials. If the apps are vital to you, this could be a lengthy recovery process.
Locating a Facebook Page That Has Been Deleted
There is a way to locate a deleted Facebook profile for reasons that are only known to you. Of course, this will display a ‘cached’ version of the profile rather than the original profile.
Here’s how to go about it:
The First Step
We’ll teach you how to do it with Google in this article. Enter ‘Site:Facebook.com profile name into the search engine. You’ll type the name of the deleted profile you’re looking for rather than the word “profile name.”
If there are any results, you should see them once you hit Enter. To access the cached version of the profile, select ‘Cached‘.
Step two
Let’s have a look at how to run this search with Yahoo! instead of Google. Type in ‘Site:Facebook.com profile name once you’ve arrived there. Instead of entering in ‘profile name,’ type in the name of the profile you want to find.
When the results (if any) appear, select ‘Cached‘ below the search item to view the cached version of the page.
the third step
It’s just as simple to use Bing to look for a profile that has been deleted. Look for the phrase “Site:Facebook.com profile name.” (Replace profile name with the desired account’s profile name)
To view the cached copy of the profile, click on ‘Cached‘ as with the other ways.
Google, for example, takes a snapshot of every page it studies and then caches that snapshot. This is a way for it to keep a backup of everything it looks at. This is how Google determines whether a page is a suitable match for your search query.
A Cached link appears in almost every search result. This strategy is likely your best choice if you’re looking for information on a deleted Facebook profile.
Apart from that, there is no method to restore information from a deactivated
Facebook account. Unless Mark Zuckerberg is keeping the information hidden from us. Even if that is the case, you are unlikely to discover it.
Facebook Groups
What is a Facebook Group, exactly? A newcomer to Facebook may be unfamiliar with the concept of a Facebook group. You can simply skip ahead if you do.
If not, we’ll tell you quickly so you can go on to the next crucial piece of information: how to construct a simple group.
In its most basic form, a Facebook Group is a page built on the network to allow a group of people with similar interests to engage with one another.
When you start a group, the name and purpose will attract people who share your interests, and you’ll be able to make new friends.
Depending on what you want to accomplish, you can make a group secret or public. A private group is perfect for sharing your passions with a small number of people you invite to the page.
Anyone interested in the topic can join a public group.
It’s all about getting the word out about your company and reaching a new, larger audience for a business.
What Is A Facebook Group And How Do I Make One?
Here are the basic steps to creating the Facebook Group you desire.
The First Step
Go to ‘Explore’ on your Newsfeed and then to ‘Groups.’
Step two
Choose ‘Create Group’ from the menu in the top right corner of your screen.
the third step
Now you’ll have to decide on your group’s settings. You’ll name the group and change the privacy settings.
Fourth step
Your group has to stand out, which you may do with a nice shot. Consider it as if you’re choosing the cover of a book.
Step five
Then, if you like, you can invite people. If at all possible, start with people you know. This will assist you in forming a community.
Step six
You can now start having fun by writing your first post. Create an interactive post, such as a poll or a request for recommendations, for the greatest results.
How to Delete a Facebook Group
You can remove a Facebook group if you’ve started one but feel it’s time to move on.
Remember that deletion is irreversible, and you won’t be able to undo it afterward.
Several less permanent options may be preferable if you’re not sure you want to delete the group permanently.
We’ll go over these options first, and then show you how to remove a Facebook group if you still want to.
A Facebook group’s name and branding can be changed.
If members are dissatisfied with the group’s current state, you might want to propose rebranding it.
To make it clear what the group is about, change the name and add branding to the cover image. Your Facebook group can also be linked to your Facebook page.
To alter the name of your group, click the three dots under your cover photo. Choose the option to “Edit group settings” and give your new group a name.
Consider choosing the highest-resolution cover photo you can find. Your Facebook group’s appearance will improve as a result of this.
Enter the ‘Edit group settings’ options once more to link the group to your page. Click on ‘Linked Pages’ and then on ‘Link your page.’ Now select the page to which you wish to link your group.
Admin of a new Facebook Group
Deleting a Facebook group will probably annoy those who have invested a lot of work in establishing it.
Instead of removing the group, why not pass it on to those individuals? By now, you should be familiar with all of your group’s most active members. If not, go out and find them.
Before you make someone an administrator, make sure they want to take over. To add new admins, go to the ‘Members’ section of your group and click the three dots next to their names. You can assign admin rights to anybody you want here.
It’s polite to pin a post that describes what’s going on in the group.
Your Facebook Group Can Be Saved
There is another alternative if you don’t want to offer other people admin rights but don’t want to delete your Facebook group.
Your Facebook group might be archived. This is also a possibility if the group’s founder has left.
When a group is archived, all posts and photos will remain viewable to all members.
New members, on the other hand, will not be able to join, and the group will not display in search results for anyone who isn’t a member.
The description of the group cannot be updated, however, members can be blocked and deleted.
The act of archiving a group is reversible; a group can be un-archived and used again.
To archive, a group, go to the page’s settings and use the option to “Archive group.”
It’s as easy as that. You’ll need to confirm your choice.
Delete Facebook Group
Let’s take a look at how to delete your Facebook group if you’ve made up your mind.
Keep in mind that this is a long-term commitment.
Notify all of the group’s members that the group will be deleted. This will allow them to save any media they choose. Allow enough time for them to prepare for the deletion.
A Facebook group can only be deleted by the group’s creator. That is unless the group’s originator has left.
This will take a long time if you have a large group. To put an end to the situation, you must delete every member of the group.
You’ll need to go to the ‘Members’ tab and click on the three dots next to each person’s name to remove them. Select ‘Remove from group’ and repeat until the final member has been removed.
Then unsubscribe from the group. You’ll need to confirm your choice.
On an iPhone, how can I delete a Facebook group?
It’s not difficult to remove your Facebook group from your iPhone or Android smartphone using the mobile app.
Simply go to the menu and choose ‘Groups’ and ‘See All.’ Then, under the ‘Groups you Manage’ option, select ‘See All’ once more.
Open the group that you want to get rid of. To see all of the members in the group, tap on it and then click ‘See All.’
You’ll have to manually remove each member, just like with the desktop app. Finally, quit the group and double-check your choice.
If you choose ‘Leave and Delete,’ the group will be permanently removed. Before deactivating the group, we recommend informing the members.
When members are removed from a Facebook group, are they notified?
If a user is removed from a group, Facebook does not tell them. When they try to interact with the group again, they will discover something is wrong.
They will no longer be able to talk or post, which will be a dead giveaway that they have been thrown out of the group.
What is the procedure for removing yourself from a Facebook group?
It is not tough or complicated to leave a group that you no longer wish to be a part of.
Simply go to the Settings section and select the group you wish to leave. Then all you have to do is select ‘Leave Group’ and you’re done.
Basics of Facebook – Pages
How To Create A Facebook Page (Facebook Basics)
You will discover that you may build a Facebook page for almost any cause. Whatever your reason, we’ll walk you through the steps.
Facebook provides a link that will take you to the Create A Page page to make things easier. You may then fill in all of the relevant details and begin constructing your fantasy page right now.
When you’re finished and satisfied, click ‘Continue’ and follow the on-screen instructions.
That’s all there is to it. Remember that anyone may build a Facebook page, but you must be an official representative of a company, public figure, brand, or organization to do so.
How to Take Down a Facebook Page
Many people create pages on Facebook because they are admirers of a celebrity and want to show their support online. Others create a personal business page that does not expand as quickly as they had hoped.
Delete a Facebook page that is no longer vital or relevant is a common necessity.
It’s simple to create a Facebook Page, and it’s just as simple to delete one. Before we get into how to delete a Facebook Page, let’s take a quick look at how to create one (in case you didn’t already know).
How to Make a Business Page on Facebook
We’ll presume you have a Facebook account and that you already have some fantastic media and stuff to contribute.
A lot of planning is required to develop a successful Facebook Page for a business. For additional information, see our thorough guide about the optimum time to post on Facebook.
Your personal information will not be displayed on your company page.
The First Step
To begin, choose the type of page you want to make — in this example, business.
Following that, you’ll be required to submit information about your company. The page’s name will be the same as your company’s name.
When people are looking for you, this makes things easier.
Step two
Determine your company’s category. If your company fits into more than one category, pick the one that is most relevant to you. Choose the category that comes to mind first when your customers think of you.
Step three
Add further information about your company, such as phone numbers and an address. You can also choose whether or not to make this information available to the general public.
Fourth step
You’ll need to choose a profile picture and cover images for your Business Page at this stage.
Make sure your photographs are relevant to your company (logo) and of excellent quality.
Keep in mind that the cover image is highly prominent, so choose wisely.
Step five
Following that comes your username, which is also known as your vanity URL. It’s the method by which a page instructs users on how to find it on the platform.
Keep it short and sweet. It can be up to 50 characters long. Your company name would be a fantastic choice.
Step six
You may now add more information about your company. We recommend that you include as much information as possible.
When people visit your page, this is what they will see, and it should tell them everything they need to know about your company.
We can now start eliminating pages. Remember that only the page’s creator can delete it; if it isn’t your page, you won’t be allowed to do so.
How can I erase my Facebook page permanently?
We’ll walk you through the process in easy-to-follow steps, just like the rest of this book.
Step one
step one is to go to the page you wish to delete and delete it. After that, select the ‘Settings’ option.
Step two
Scroll through the choices in the ‘General Tabs’ until you locate ‘Remove Page.’
the third step
Simply select ‘Delete’ and confirm your selection.
That’s all there is to it when it comes to deleting a Facebook profile. Keep in mind that deleting a page on Facebook can take up to 14 days.
How Do I Delete My Facebook Business Page?
A basic Business Page is required for many marketing methods. However, not everyone is cut out to run a business, and such a page may no longer be necessary.
It’s conceivable that you’ve got too much on your plate right now to devote time to your business and its page.
You don’t have to delete the page in that scenario. Unpublish the business page instead and return to it when you have more time.
Unpublishing a page makes it inaccessible to other Facebook users and the general public.
Remember that only the administrator of a Facebook Business Page can unpublish or delete it.
Unpublish Facebook Business Page
Your business page is instantly published once you’ve finished creating it.
Unpublishing is the way to go if you’re still working on it or want to put it on the back burner.
Unpublishing a page that has to be updated or modified for whatever reason is also a smart idea.
The First Step
Go to your Facebook Business Page’s ‘Settings’ section.
Step two
In your ‘General’ tab, select the ‘Page Visibility option, which should be near the top of the options list.
Step three
To unpublish the selected page, select the ‘Page Unpublished’ option. After that, click ‘Save,’ and your page will be hidden.
All you have to do to republish your page is return to these settings and adjust the visibility of your page to ‘Page Published.’
That is all there is to it.
How to Delete a Facebook Business Page Forever
Before you go ahead and delete your business page, keep in mind that this is not a reversible step.
Furthermore, Facebook will not go the extra mile and, for example, send you an email informing you of the decision.
So, consider again before proceeding with the removal.
Here’s what you do if you’ve made up your mind:
The First Step
Go to the settings menu on your Facebook Business Pages.
Step two
Scroll down until you find the option to “Remove Page,” then click the “Edit” button next to the “Delete Your Page” option.
the third step
Now, select ‘Permanently Delete,’ and your page will be permanently erased. You must, of course, confirm your decision.
The deletion of your Facebook Business Page will be scheduled once you’ve decided to deactivate it permanently.
It could take up to two weeks for the page to be removed completely. It is possible to cancel the process within this period. So, if you have second thoughts and aren’t sure if you want to delete a Facebook page, now is your time to undo it.
Simply navigate to your page and select the ‘Cancel Deletion’ option towards the top of the page.
You won’t be able to restore the page after the 14-day deadline has ended. You now know how to remove a Facebook page from your account.
What Is the Best Way to Recover a Facebook Page?
Unfortunately, in this day and age of hackers, vengeful people, and even technological malfunctions (they happen! ), knowing how to recover a Facebook page is essential.
If your personal or business page has been taken over by someone else, you may want to know that you may regain control.
You may need to reclaim control of your Facebook page for a variety of reasons. It’s possible that you were erased by an enraged administrator, and you’re no longer in charge.
You may not have created the page, but the prior owner is no longer active and has not responded to your messages.
When a certain number of individuals ‘check-in’ and provide reviews, a page is established automatically. If this happens to your company, you may want to make some changes to make it look more professional.
Whatever the case may be, Facebook is aware that this may be a problem for some of its users. As a result, they’ve offered a solution.
It also won’t take an eternity!
All you have to do is go to this link, explain the situation, and provide all pertinent information, then wait for a response.
This could take anywhere from a few hours to several days. You may need to be a little patient, but it normally doesn’t take long.
Within three says If you don’t hear back, send your email again.
To regain control of your Facebook page, that’s all you have to do.
If that doesn’t work (it should), you’ll need to contact Facebook and warn them that someone is using your intellectual property without your permission on their site.
Additional Tips for Using the Facebook Platform
Basics of Facebook Never, ever, ever, ever, ever, ever, ever, ever, ever, ever
Many newcomers make the mistake of oversharing on Facebook, which is not advised. You don’t have to finish your About page until it’s full.
Instead, think of Facebook as a nice telephone directory. Communicate with your pals and reminisce.
However, don’t share any information that you wouldn’t want absolute strangers to know.
Limit Who Has Access To Your Profile
You want to make your Facebook page private so that strangers can’t see what you’re up to.
Your posts can be viewed by anybody who has an internet connection by default.
Your profile will appear in search engine results as well.
Unless you want unwanted attention, we recommend that you adjust your privacy settings as soon as you create your account.
Select the ‘Privacy’ option from your ‘Account Settings.’ You can control who can view your posts and whether or not search engines should link to your profile. This will improve the visibility of your posts on the Facebook newsfeeds of your friends.
Final Thoughts on the Fundamentals of Facebook
There you have it: a comprehensive guide to using Facebook. With a rudimentary understanding of this highly popular social media network, you can now make the most of it.
Now you know how to unblock someone on Facebook, delete a Facebook group, change your Facebook name, and delete a Facebook page, among other things.
It’s time to claim you understand the fundamentals of Facebook and how to use it.
You may now become a master of Facebook and all of its features.
you may also like to read,
